


Reformer Pilates Setup Guide: How to Set Up Your Machine at Home
There's a particular feeling when a reformer shows up at your door: half excitement, half "okay, now what." The first few hours after delivery usually decide how well a reformer Pilates machine setup actually holds up over the following months. Rush it, and you end up with a misaligned carriage, springs tensioned wrong, or a machine wedged into a spot where you can't move around it properly.
- Sale price
- £589.99
- Regular price
-
£989.99 - Regular price
- £589.99
- Unit price
- per
- Sale price
- £525.00
- Regular price
-
- Regular price
- £525.00
- Unit price
- per
What You Need for a Reformer Pilates Setup
Setting up a Reformer Pilates machine at home requires more than simply finding a space for the equipment. Before getting started, make sure you have a suitable area, stable flooring and enough room to move safely around the reformer. Having everything ready beforehand can make the setup process easier and help you get the most from your workouts.
A Suitable Reformer Pilates Machine
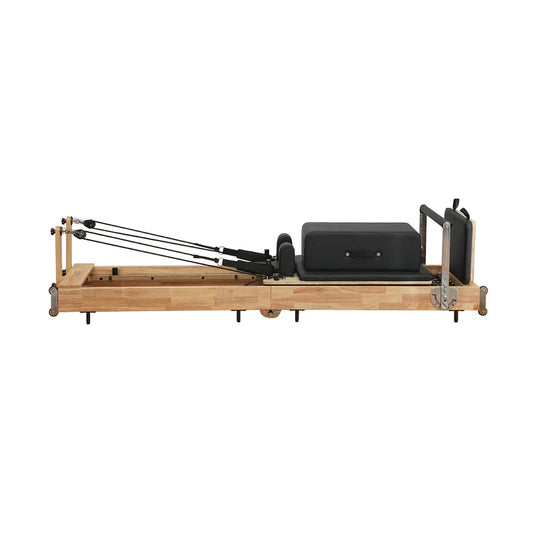
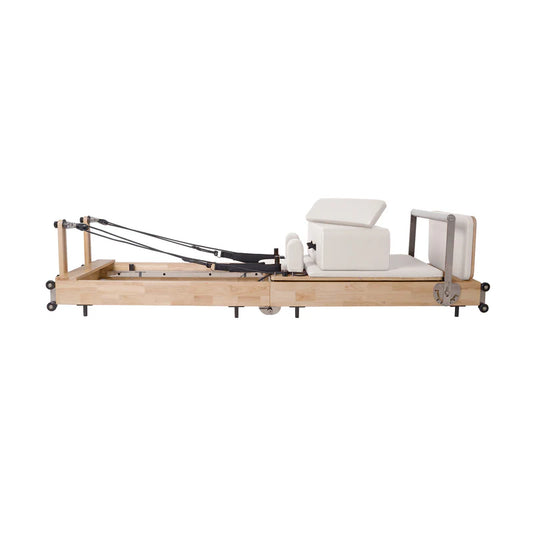
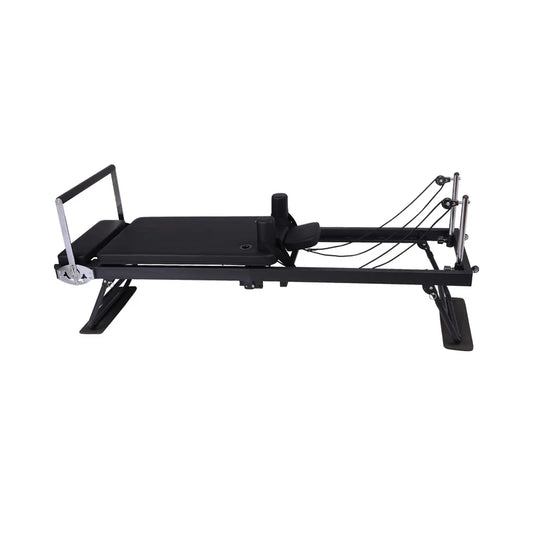
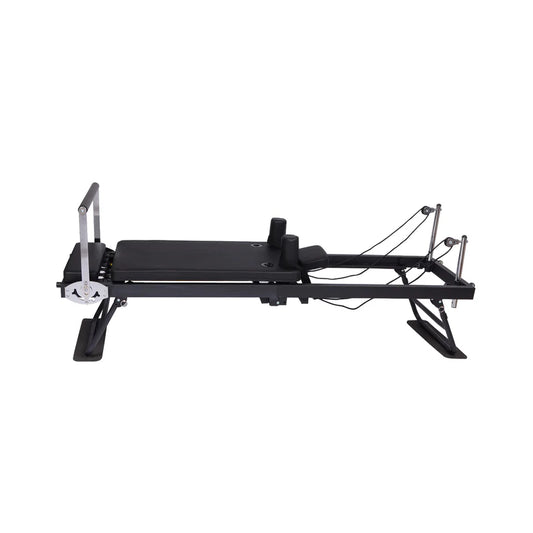
Start by choosing a reformer that suits your available space, experience and intended use. Check the machine’s dimensions before purchasing, particularly if you have limited room. A foldable reformer can be a practical option for smaller homes, while a fixed model may be more suitable when you have a dedicated Pilates area.
Enough Space Around the Machine
The reformer should have enough clear space around it for comfortable movement during exercises. Measure the area before positioning the machine and consider the full length of the carriage and footbar when planning your setup. Always check the manufacturer's recommended clearance for your specific model.
Suitable Flooring
A stable, level surface is important for a safe and comfortable Reformer Pilates setup. Hard flooring can provide a firm base, while a suitable exercise or protective mat can help prevent movement and protect the floor underneath the machine. Avoid placing the reformer on an uneven or unstable surface.
Pilates Accessories
Depending on your reformer and workout routine, you may also want useful Pilates accessories such as a Pilates ring, resistance bands, a Pilates ball or a suitable exercise mat. These are not always essential, but they can add variety to your sessions and support different exercises.
A Safe and Comfortable Environment
Good lighting, ventilation and a clutter-free area can make your home Pilates space more comfortable. Keep furniture, cables and other objects away from the reformer so you have enough room to move without unnecessary obstacles.
Time to Check the Setup
Once everything is in place, take a few minutes to check the reformer before your first workout. Make sure the machine is stable, the footbar and springs are correctly positioned, and the carriage moves smoothly. Following the manufacturer's setup and safety instructions is also important, as requirements can vary between reformer models.
Planning the space before the box even arrives
A good home Pilates reformer setup starts before you've even opened the box. Measure the space. Check that underfoot carpet, hardwood, and tile all interact differently with a reformer's feet, and plenty of owners end up adding a non-slip mat under the frame on harder flooring just to stop it shifting slightly during use.
If you care about checking your own technique, think about lighting and where a mirror might go, too. Doesn't need to be fancy. A clear sightline to a mirror catches postural mistakes early, which matters most in the first few weeks while you're still learning where your body actually is in space relative to the carriage.

Unboxing and the initial assembly
Most reformers arrive partly disassembled, just for shipping safety. Rails, carriage, footbar, spring system, they all need connecting, usually following a manual that's seen better translation work, if we're honest. Lay everything out before you start. Genuinely, just check nothing's missing before you touch a single bolt.
If you're new to setting up reformer Pilates at home, this part can feel more technical than it needs to. Most modern machines really only use a handful of bolts and a fairly obvious rail-locking system. Go slowly, check each connection against the manual twice if you have to, especially around where the spring hooks attach, since that's exactly what determines how accurate your resistance feels later on.
The assembly sequence, roughly in order
Pilates reformer assembly tends to follow the same basic sequence no matter the brand:
- Rails attached to the base frame
- Carriage secured onto the rails
- Footbar connected and set to the correct height
- Spring system attached at the starting tension
- Straps and pulleys are threaded last, once the frame is solid and level
Check the carriage glide here before you do anything else it should move smoothly along the rails, with no sticking and no grinding noise. If resistance feels uneven from one side to the other, fix the rail alignment now, not after your first workout when it's a lot more annoying to sort out properly.
How much space do you actually need?
Space deserves its own bit of thinking, separate from just fitting the frame into a room somewhere. A reasonable reformer Pilates space guide would suggest a minimum of three metres in length and around 1.5 metres in width, enough for full carriage extension and safe arm and leg movement during footwork or presses. Ceiling height matters too if you're planning to use overhead straps or any standing work later on.
Awkward layouts, low ceilings, and shared rooms most of that gets solved by putting the reformer along the longest unobstructed wall rather than trying to centre it in a smaller room. You don't need a dedicated gym. You just need to think about it for five minutes before you commit to a spot in the house. Compare it to commercial reformer Pilates setups in a studio, which are built for permanence, no folding, no repositioning, just constant use day after day by different people.
Choosing a foldable setup
A foldable Pilates reformer is the obvious compromise if you don't have permanentstorage. These fold the carriage and rail system down into something you can lean against a wall or store upright between sessions. The trade-off is a slightly more involved setup and breakdown each time you use it, though honestly, most people get it down to under a minute after the first week or so. It's a reasonable price to pay for getting your floor space back, especially in a flat or somewhere you're sharing with other people.
Fixed setups and expanding the equipment later
Some people prefer the opposite approach entirely: a reformer bed Pilates configuration, set up semi-permanently in something closer to a low platform or bed shape. Works well if you've got a dedicated room for it. You give up portability but gain stability, and it feels a bit closer to what you'd get in an actual studio session.
If you're expanding the setup down the line, a Pilates Cadillac reformer trapeze table can be added alongside the main carriage machine, too. It needs considerably more space and money, but it opens up suspended and assisted exercises that the standard reformer just can't do on its own. Most beginners don't need it, but it's worth knowing the two pieces work together for anyone planning a more serious home studio eventually.
Foldable vs Fixed Reformer Pilates Machines
Choosing between a foldable and fixed Reformer Pilates machine largely depends on the space available in your home and how you plan to use the equipment. Both options can work well, but each has different practical benefits.
| Feature | Foldable Reformer | Fixed Reformer |
| Space | Ideal for smaller rooms | Better suited to dedicated spaces |
| Storage | Can be folded away when not in use | Usually remains in one position |
| Convenience | Easy to store between workouts | Ready to use without repositioning |
| Room Requirements | Useful where space is limited | Requires a more permanent setup |
| Home Use | Practical for flexible home workouts | Suitable for dedicated Pilates areas |
| Stability | Depends on the specific model | Designed for a permanent setup |
| Best For | Smaller homes and multi-purpose rooms | Dedicated Pilates or workout spaces |
Keeping it maintained
Once it's assembled, a Pilates machine for home still needs occasional upkeep to stay safe:
- Check the spring hooks for wear
- Tighten any bolts that work loose with regular use
- Wipe down the rails so dust doesn't build up under the carriage
A quick monthly look is plenty for most home setups; heavier daily use might need a bit more attention than that.
Setting up quickly when space is tight
For anyone short on permanent space, a Pilates reformer machine for home use can realistically go from folded to ready in a few minutes once you've got the routine down, provided you've chosen a fold-up reformer Pilates machine to begin with. That makes it workable even in a living room that needs to go back to being a living room twenty minutes after your workout ends. Home users don't need that level of toughness, but it's a useful way to understand why commercial machines are heavier and less portable by design.
Reformer or mat — does it actually matter?
A question that comes up constantly once people own a reformer is the reformer Pilates vs mat Pilates debate. Mat work is still genuinely valuable, and it needs zero equipment, but it relies entirely on body weight and gravity for resistance. A reformer adds adjustable spring tension, a wider range of motion, and assistance for certain stretches that are hard to control safely on a mat alone. Most home users end up doing both mat sessions on days the reformer isn't set up, carriage work for the more structured strength and flexibility sessions.
Checking it actually sits level
Once everything's bolted together, checking the machine sits dead level is more important than it sounds. An uneven floor, or a slightly off base, can make the carriage drift to one side while you're using it. Annoying in the moment, and it puts uneven strain on the springs over time too. A cheap spirit level across the rails will show you any tilt, and most reformers have adjustable feet built in specifically to fix this.
Worth giving the frame a gentle shake by hand before your first session as well, just checking nothing moves where the rails meet the base. Properly tightened, the whole thing should feel completely solid underfoot, with any movement you feel coming from the carriage, not the frame itself shifting around.
Spring tension for your first session
People consistently set the resistance too high for their first session, even those who think of themselves as pretty fit. Start light. It lets you learn how the carriage actually moves without fighting unfamiliar resistance at the same time. Springs are usually colour-coded by tension, and the manual that comes with the machine generally suggests a sensible starting combination for footwork and general conditioning.
Pull the carriage out by hand and test each spring individually before combining them, taking a minute, maybe two. Saves you from the classic early mistake of setting things too heavy and developing bad form while trying to muscle through an unfamiliar load before you're ready for it.
Common setup issues and how to fix them
- Sticky or uneven carriage — almost always an unlevel frame, or debris caught in the rail track
- Squeaking during movement — usually just needs a manufacturer-approved lubricant on the rails
- Uneven resistance side to side — usually, the spring hooks aren't seated evenly, fixed with a quick visual check during assembly
Better to deal with all this during setup than three weeks in, once you've already half-formed bad habits around whatever's actually going wrong.
Final thoughts
Setting up a home reformer takes a bit of patience the first time around, but it pays off with safer, better workouts going forward. Careful thinking about space, a proper assembly process, and choosing between fixed or folding designs all add up to a setup that actually gets used, instead of getting abandoned after the first month as so much other home gym equipment does.
Frequently Asked Questions
Where's the best spot to set it up at home?
Where's the best spot to set it up at home?
Anywhere with a flat, level floor. Carpet or hardwood both work, just throw a mat under it. Avoid sloped floors; the carriage needs a level track to run on.
How do I pick spring resistance as a beginner?
How do I pick spring resistance as a beginner?
Go lighter than feels necessary at first, one or two springs is plenty. Add more once the movements actually feel solid.
How do I set the footbar height?
How do I set the footbar height?
Roughly a 90-degree knee bend with legs extended works for most exercises. Lower it down for seated arm work. Once you find your number, remember it.
Do I need to adjust the shoulder blocks every time?
Do I need to adjust the shoulder blocks every time?
A quick check each session, especially if someone else uses it too. Snug but not restricting your shoulders.
How do I know if the carriage is running smoothly?
How do I know if the carriage is running smoothly?
It should glide without grinding or sticking. Squeaking usually just means the rails need a wipe down or the rollers need a bit of lube.
What's the safe way to attach straps?
What's the safe way to attach straps?
Hook them all the way in and tug once to check before you start. A half-hooked strap can pop loose mid-exercise, which catches people off guard.
How do I adjust the setup if multiple people use it?
How do I adjust the setup if multiple people use it?
Mostly just footbar and headrest by height. Honestly, just write down everyone's settings somewhere so you're not guessing each time.
What should I check before every workout?
What should I check before every workout?
Springs in their slots properly, footbar locked, carriage moving freely, safety stopper in place. Becomes second nature after a week or two.
Do I need special flooring under it?
Do I need special flooring under it?
It is not required, but it helps. A mat protects your actual floor, cuts noise, and keeps the frame from sliding around mid-workout.
How often should I recheck the whole setup?
How often should I recheck the whole setup?
Once it's dialled in, you're mostly set, but give it a once-over monthly. Straps fray, and springs weaken slowly; it's better to catch it early than mid-session.

Recent Posts


- Sale price
- £589.99
- Regular price
-
£989.99 - Regular price
- £589.99
- Unit price
- per
- Sale price
- £699.00
- Regular price
-
- Regular price
- £699.00
- Unit price
- per
- Sale price
- £525.00
- Regular price
-
- Regular price
- £525.00
- Unit price
- per


